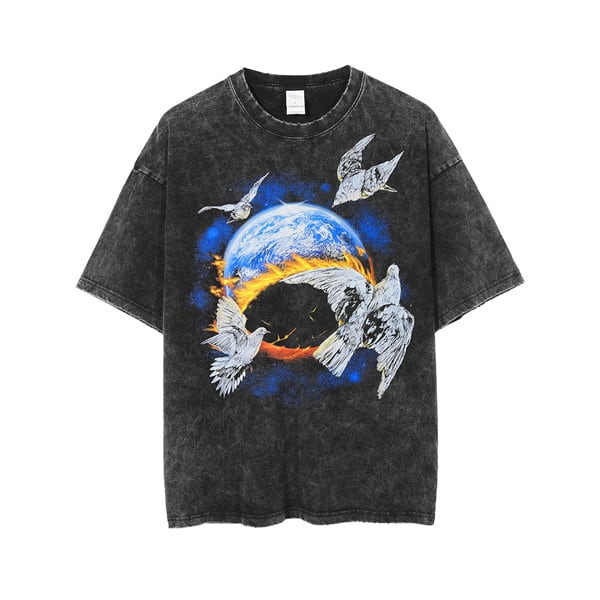
Ever thought about making your own clothes? Imagine crafting a custom hoodie by hand. It’s not only a way to show off your personal style, but it’s also a creative journey. This guide will help you start that journey, turning a basic sweatshirt project into something special. Whether you’re a beginner or a seasoned crafter, we’re here to support you. Let’s create a hoodie that’s comfy and filled with personal pride.
Starting a DIY hoodie project might seem hard, but don’t worry. With simple tools and basic sewing skills, anyone can create a cozy hoodie. Choosing the right pattern, like the beginner-friendly Sol Hoodie, and the perfect fabric, such as soft fleece-back merino wool, is the first fun step.
To make your hoodie, you’ll need some tools. A ballpoint or stretch needle that matches your fabric is essential to avoid sewing problems. You might also want to add a unique touch with a cord for the hood or twill tape for the neckline. Every choice you make brings your idea closer to reality.
Getting the right size and fit is key. You’ll likely need about two yards of fabric for an adult-sized hoodie. If you care about the environment, using an old sweatshirt as a pattern is a great sustainable option.
When you’re ready to sew, it’s all about paying attention to the details. This includes sewing seams correctly and maybe even adding a zipper. You could also choose bright colors that stay vivid after washing, creating a hoodie that’s unique and long-lasting.
Together, let’s make your DIY hoodie dream come true. Grab your fabric, and let’s start sewing your custom hoodie today!
Key Takeaways
- Embarking on a DIY hoodie project is not just fun but allows you to express your unique sense of style.
- Selecting the correct needle and fabric type can make or break your sewing experience1.
- Choosing a beginner-friendly pattern like the Sol Hoodie can guide you seamlessly through the process1.
- Opting for high-quality fabric such as fleece-back merino wool can elevate the final product1.
- Eco-conscious crafters can utilize old sweatshirts for patterns, supporting a sustainable approach2.
- Personal touches such as custom colors enhance the hoodie’s uniqueness and long-term vibrancy3.
- Completing the hoodie with attention to detail will not only showcase craftsmanship but also ensure comfort and durability1.
Essentials for Crafting a Custom Hoodie
Starting to make a hoodie means picking the right supplies. About 55% of US consumers like clothes that are good for the planet. So, it’s important to use materials that are kind to Earth when you gather your sewing items4. Organic fabrics like ring-spun cotton, fleece, and French terry are not only comfy. They also fit the increasing need for eco-friendly clothes in the market5.
You will need about 2 1/2 yards of sweatshirt fleece knit fabric for the main part of the hoodie. For the cuffs and waistband, get 1/4 yard of rib knit. These materials are tough, meaning your hoodie will be cozy and last a long time. Adding an eyelet kit for the drawstring holes and a strong shoelace for the hood’s drawstring makes your project both useful and personal.
- Fusible interfacing scraps to make the fabric stronger at important spots
- Ability to use stretch stitches for seams that must stretch
- An optional PDF pattern for perfect size and cut

Thanks to online communities, custom designs are super popular. Embroidery is a great way to add unique, lasting designs to your hoodie4. Machines like the Ricoma embroidery machine are strong and easy to use. They are great for new designers wanting to stand out with their clothes4.
Along with embroidery, consider screen printing and DTG for their ability to handle bright colors and detailed designs5. These methods are perfect for the fine details that fans of custom hoodies love and look for.
Using top-notch fabrics and green practices in making your hoodies shows you’re up-to-date with trends and care about the planet. With the right supplies for a custom hoodie, sewing becomes an outlet for your creativity. It shows your brand’s promise for quality and commitment to being eco-friendly.
How to Make Your Own Hoodie: Preparing Your Pattern and Fabric
Starting your hoodie project involves two key steps. First, pick the perfect fabric. Next, get your pattern ready for fabric transfer.
Selecting the Perfect Fabric
Hoodie fabric selection is all about texture and how much it can stretch. For a warm feel, sweatshirt fleece is great. You’ll need about 2.5 yards for a basic hoodie. Its thickness and softness make it ideal6. For something lighter, jersey material or stretch cotton are good picks. They let your skin breathe and stretch enough for daily activities. Make sure the fabric stretches about 30%, especially at the cuffs and waistband to ensure comfort6.
Choosing and Adapting Your Hoodie Pattern
Finding the right hoodie pattern suits your skill level and style is vital. Beginners can find free patterns that are easy to follow, suitable for a chest size of 36-38 inches. This gives a nice start to DIY fashion6. If you’re more skilled, the Conroe Sweatshirt pattern might be for you. It fits chest sizes from 31-60 inches, offering a range of custom hoodie design options6.
To start your project, print and tape your pattern based on your measurements7. You might need to adjust it for a perfect fit or to add special design elements.
Transferring Your Pattern to Fabric
With your pattern ready, it’s time to transfer it to fabric. Place your fabric flat, then trace the pattern on it. Be precise. Add seam allowances and marks to help with the next sewing steps7.
Next comes cutting the fabric. Use sharp tools for clean cuts. You will need around 2.5 yards of the main fabric and some rib knit for cuffs. This ensures you have everything you need for your hoodie6. Accurate cuts now make sewing easier and improve your hoodie’s final look.
Finally, gather other supplies like an eyelet kit for drawstrings, and fusible interfacing for reinforcement. A 36″ shoelace and a mallet are needed for professional finishing touches to your hoodie6.
Taking time to accurately size and prepare each component ensures your DIY project’s success. Enjoy creating your custom hoodie. It combines your creativity with the pride of making something on your own.
Mastering the Sewing Techniques for Hoodie Construction
Learning to sew a hoodie involves mastering many steps. This improves the look and quality of your hoodie. Whether you’re new or have lots of experience, knowing how to use your sewing machine for hoodies is key. Let’s dive into the main steps and tips for sewing a great hoodie.
First, it’s important to choose the right fabric. Cotton is soft and perfect for everyday hoodies8. Fleece, on the other hand, is warm, making it great for cold weather8. Blended fabrics mix polyester’s strength with cotton’s comfort, best for exercise clothes8.
To start, you need to cut the fabric pieces accurately. For a comfy chest area, the front should measure 10 1/8 inches9. A back measurement of 4 1/2 inches gives room to move9. For a good fit, the hood should have a 7 3/4 inch depth and a 12 1/2 inch height for the head and neck9.
For stretchy parts, a zigzag stitch works best. It lets the fabric stretch without the seam breaking. This step is crucial for a comfy and long-lasting hoodie.
- Attaching the hood means careful pinning and stitching to fit the neckline right.
- Setting in sleeves correctly allows for easy movement.
- Marking the pocket spot before attaching keeps it useful and nice-looking.
Adding special features, like a knotted hood, can make your hoodie stand out. Aim for at least a 12-inch tail for a cool and practical design9. Including ear shapes on kids’ hoods adds a fun element. It’s important to get the placement and size right9.
Ensuring top-notch finishing details, such as clean stitches, ironing well, and accurate seam allowances, is crucial for a professional-looking hoodie9. These steps strengthen the fabric and enhance the hoodie’s look and durability.

| Fabric Type | Benefits | Common Use |
|---|---|---|
| Cotton | Softness and breathability | Casual wear8 |
| Polyester | Durability and wrinkle resistance | Sportswear8 |
| Fleece | Warmth | Winter gear8 |
| Blended | Combines benefits of multiple materials | Active wear8 |
In conclusion, making a hoodie takes attention to detail and dedication. Whether it’s a simple style or one with extra features, each step matters. From picking fabric to the final stitch, it’s a chance to get better at using your sewing machine for hoodies.
Adding Personal Touches to Your DIY Hoodie
Making your DIY hoodie one-of-a-kind is vital. We’ll show you how to add special touches. These include customizing with hoodie grommets, creating unique pocket designs, and ensuring comfortable finishes.
Customizing with Grommets and Drawstrings
Add hoodie grommets for a professional look and better functionality. This lets you put in drawstrings. With an eyelet kit, you can easily fix these grommets onto your hoodie. This improves both looks and usefulness. Slide a sturdy shoelace or any cord through these grommets. It boosts the hoodie’s style and brings adjustable comfort. With over 4000 reviews, a high score of 4.7 shows people love these custom touches10.
Unique Pocket Designs and Placement
Pockets on a DIY hoodie offer more than function; they’re a chance to show your creativity. Choosing how your hoodie’s pocket looks and where it goes can make your hoodie stand out. Use top-stitching to keep pockets secure yet chic. Designing where your pockets go mixes practicality with fashion. It’s key in making your hoodie different from those that are mass-produced. Starting at $20 for a basic blend, making a unique hoodie is both budget-friendly and satisfying10.
Crafting Comfortable Cuffs and Hem Bands
For a snug fit, concentrate on the cuffs and hem band of the hoodie. Rib-knit fabrics are a smart choice because they stretch. They help these hoodie parts keep their shape and be comfortable. Sewing the hem band and making sure cuffs fit the hoodie sleeves right is important. Yet, it’s key to a durable and comfy finish. Using something like Printify’s mockup generator can prevent mistakes. It also improves the overall design11.
| Custom Detail | Benefit |
|---|---|
| Hoodie Grommets | Adds aesthetic and functional value |
| Drawstring Addition | Enhances fit and comfort |
| Unique Pocket Placement | Boosts utility and style |
| Comfortable Cuffs and Hem Bands | Ensures lasting shape and comfort |
Bringing your creativity to life by adding drawstrings, designing pockets, or sewing cuffs and hem bands can transform a simple hoodie into a unique item. It shows off your personal style and brand identity.
Conclusion
Creating your custom hoodie is a fun journey that blends creativity with fashion. It lets individuality stand out. The trend of making unique hoodies is growing, as seen in pop culture and among famous people1213. This DIY trend shows the value of expressing yourself and moving towards custom-made clothes.
Choosing the right fabric is key for a comfortable and durable hoodie. Cotton is breathable while polyester blends last long and keep colors vibrant1213. Today, people also look for eco-friendly materials like organic cotton or recycled polyester, reducing harm to the environment12. Making a hoodie that tells your story or follows trends turns a simple piece into something special. It shows pride and care in every part of the creation12.
Finishing a hoodie that’s uniquely yours is incredibly rewarding. It’s proof of your crafting skills and creativity. From picking colors and patterns to placing designs just right, and picking the best quality materials, you end up making more than just clothes13. It’s a statement of your creativity, showing off your innovation and connecting with others who love fashion.
FAQ
What materials do I need to make my own hoodie?
To make a hoodie, gather 2 1/2 yards of fleece knit and 1/4 yard of rib knit. You’ll also need an eyelet kit, fusible interfacing, and a shoelace or durable cord. Consider getting a hoodie pattern and learn some sewing basics.
How do I choose the right fabric for my custom hoodie?
Think about the hoodie’s look and feel. Choose fleece or stretch cotton for warmth or jersey for a lightweight option. Ensure the fabric stretches enough and buy extra.
Where can I find patterns for sewing a hoodie?
You can download hoodie patterns online. Pick one that fits your skill level and desired style. Make sure to choose the right size.
What sewing techniques should I know before assembling a hoodie?
Learn to sew straight and curved lines. Also, how to add grommets, drawstrings, and cuffs. Stretch stitches like the basic zigzag are essential. Watching a step-by-step video can help beginners.
How do I incorporate grommets and drawstrings into my hoodie?
Attach grommets with an eyelet kit and mallet. Then, lace the drawstring through for function and style.
Can I add unique pocket designs to my DIY hoodie?
Yes! Design your own pockets to make your hoodie unique. Measure, place, and sew them on the front piece using a straight stitch.
How do I craft cuffs and a hem band for my hoodie?
Cut the rib knit to fit your wrists and waist. Sew the cuffs and hem band on, stretching the fabric slightly for a good fit.
What satisfaction can I expect from creating my own hoodie?
Making your hoodie brings joy and pride. It’s special to wear something you made that shows off your style and sewing skills.